
 0
0

ledlabs sprzedawca
How to install the LED profile
We desire LED lighting to be visually attractive, but even more so, economical and long-lasting. Even though LED strip profiles are already a recognisable product on the Polish market, installers often overlook them. It is therefore worth promoting the profiles in terms of their level of effectiveness and efficiency. By placing the LED strip in the profile, its shelf life is significantly extended. It is said that aluminium profiles are like a radiator, which means that they are an excellent heat conductors. The result of this property is that the LED diodes in the LED strip do not heat up so much and therefore have a much longer shelf life. All that taken into consideration, if we want the installed lighting to serve us efficiently for many years, the selection of a suitable profile for the LED strip is a key element of choice.
When we decide to choose the aluminium profiles solution for the LED strips, the question arises: how do you install the LED profile? If you want to install the lighting by yourself, this article is for you.
The aluminium profiles for LED strips differ from each other due to their application and construction. This, in turn, translates into specific installation methods. Here are the most popular of them.
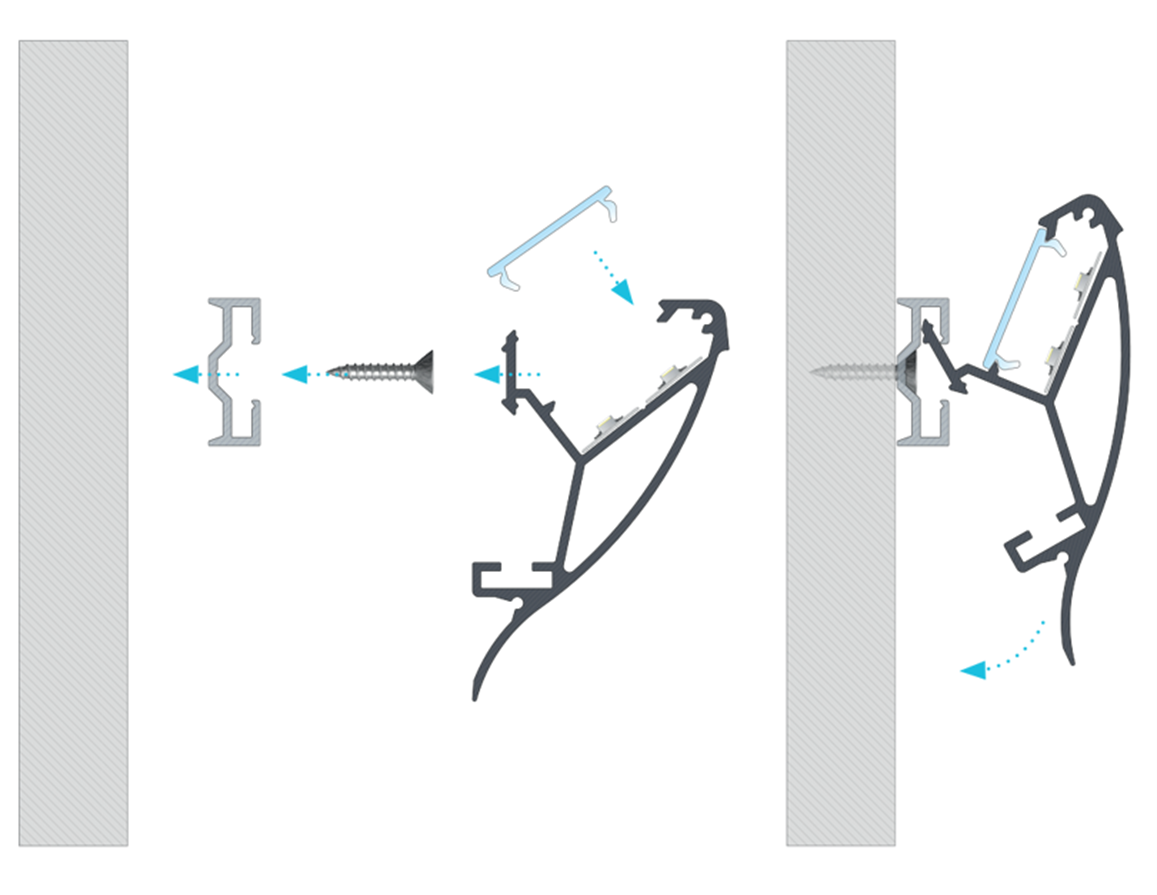
Fixing with screws
Fixing with screws is suggested when we are dealing with profiles of a specific structure, which are designed to align the screw head with the surface of a given profile. Assembly with screws is one of the most durable methods to attach the profile to a base. It should not be forgotten that the LED strip must also be properly attached to the profile to make the whole element solid and durable. Any unevenness in the profile to which we will stick our LED strip can reduce its shelf life. It is therefore worth checking whether the screw heads do not interfere with the correct assembly of the strip in the profile. Any bulging can affect the shelf life of our lighting.
Which profiles will be the best for assembly with screws? Those with specially separated spaces for screws, designed so that they do not come into contact with the LED strip. An example of such a profile is the RETO Lumines Lighting.
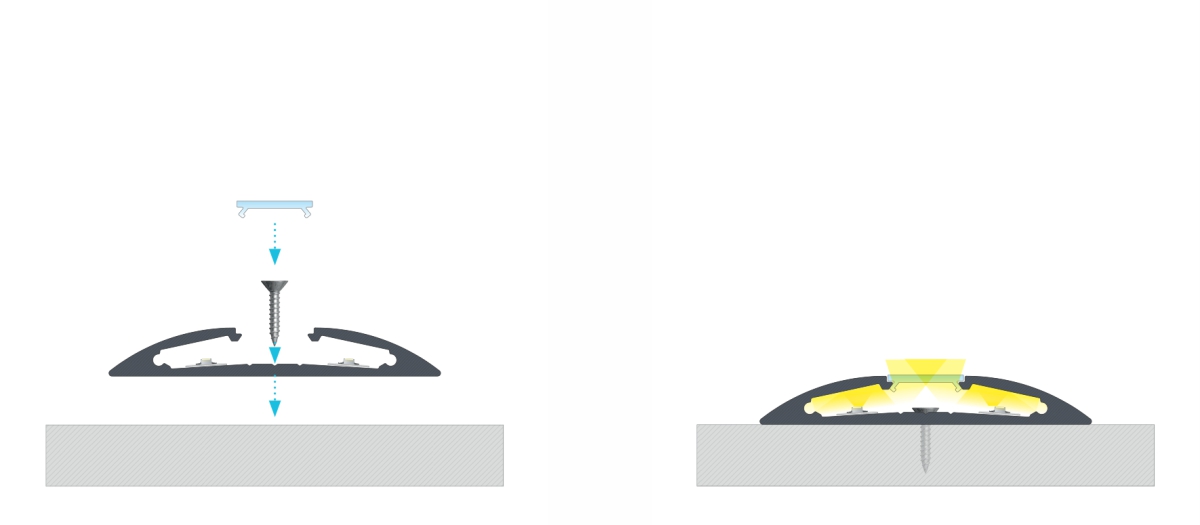
Assembly of the RETO Lumines profile with a BASIC cover using an assembly screw.
Double-sided sticky strip
Profiles with a simple structure and a flat base can, in most cases, be attached to the base with a double-sided sticky strip. When deciding on such an fixing solution, we should pay attention to two key factors. The first is the selection of an appropriate, good-quality double-sided sticky strip. The second is to prepare the surface for fixing. Before sticking the profile, we must ensure that the surface is properly cleaned. It is also important to degrease and remove any impurities from the profile itself.
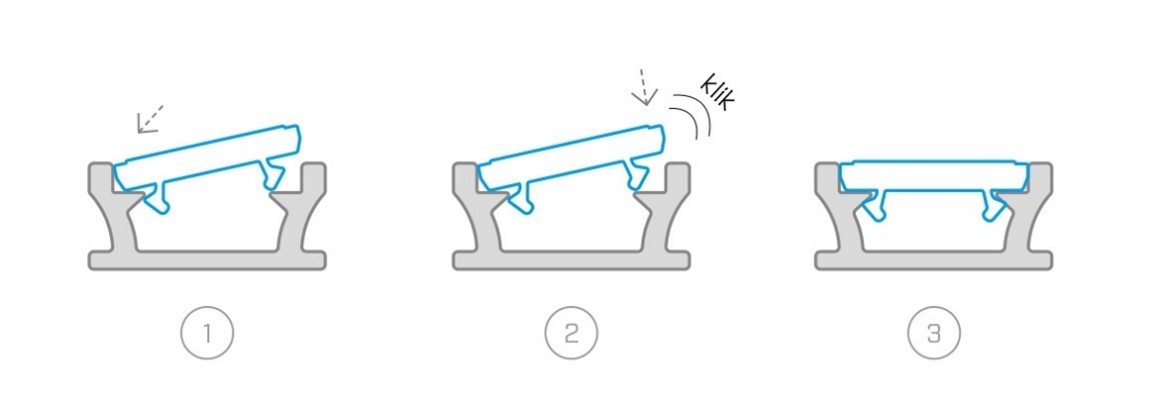
Assembly instructions for angle C Lumines profile using the double-sided sticky strip
Brackets
Brackets are another great method for securing profiles. It is a frequently used solution for furniture profiles. The brackets are attached to the chosen surface with screws, and then the profile can be placed onto it. It is a relatively simple method because, once the brackets are fixed, all that is required is to place the profile into the pre-fitted holder. Detachment is equally as easy. If necessary, all that is required is to pull the profile out of the holders. Bear in mind that this assembly method somewhat changes the final appearance of the profile but this, in turn, allows you to achieve new lighting effects.
An excellent example of using the assembly brackets is the H Lumines Lighting profile. This profile is often installed under kitchen cabinets to illuminate the worktop. The H profile is characterised by the fact that the angle of incidence of light depends on the profile arrangement, so you can choose an angle of either 30 or 60 degrees.
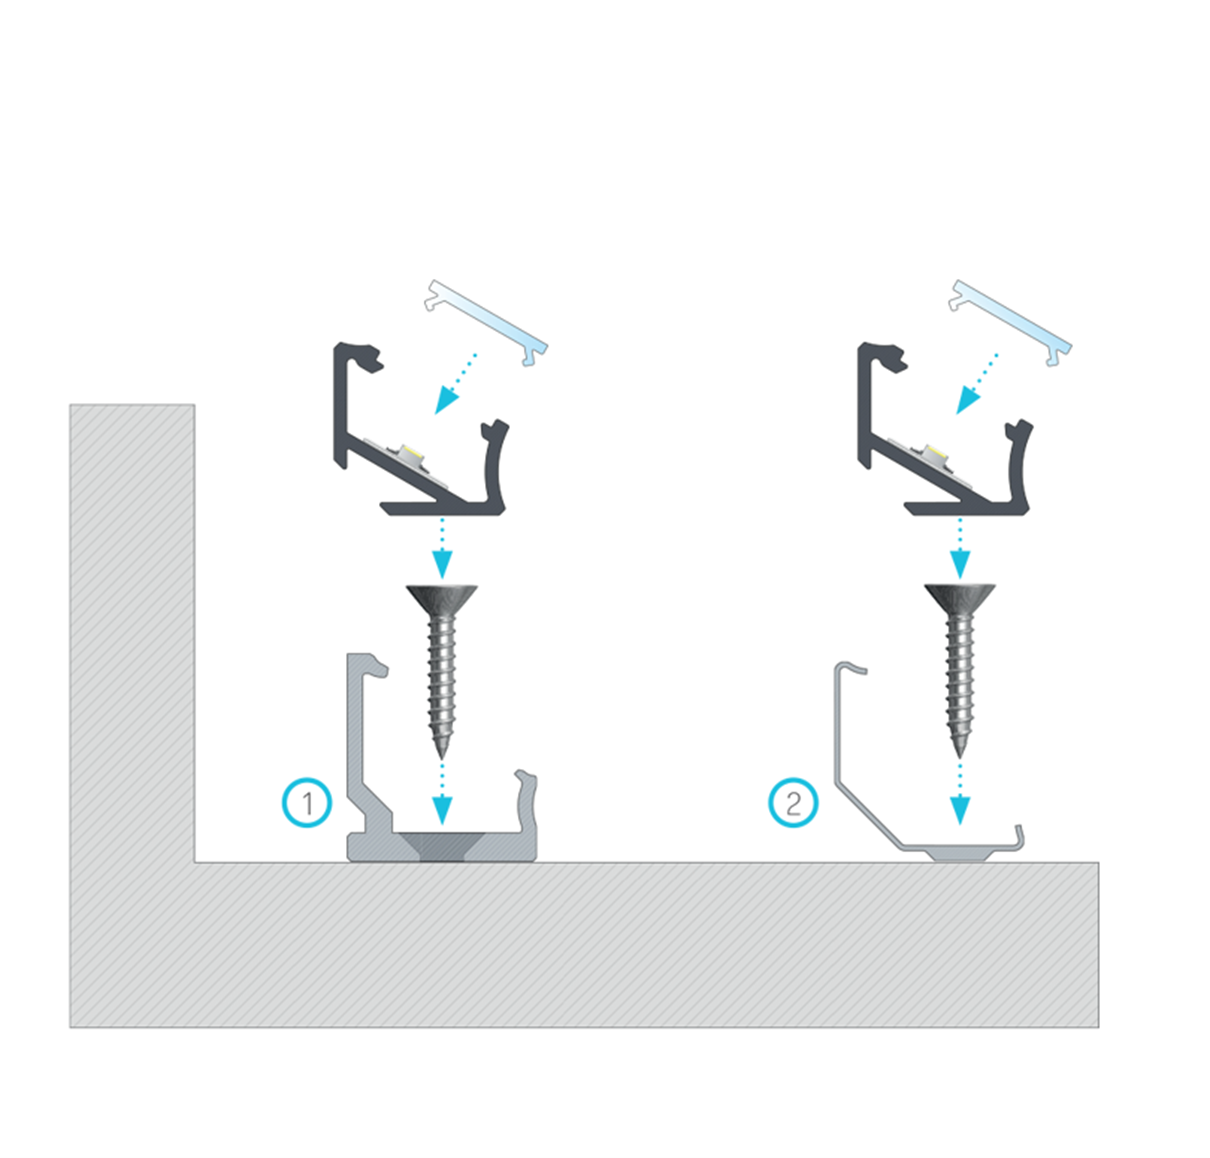
Assembly instructions for the H Lumines profile at an angle of 30° using (1) a plastic assembly clip CH, (2) a metal mounting clip CH.
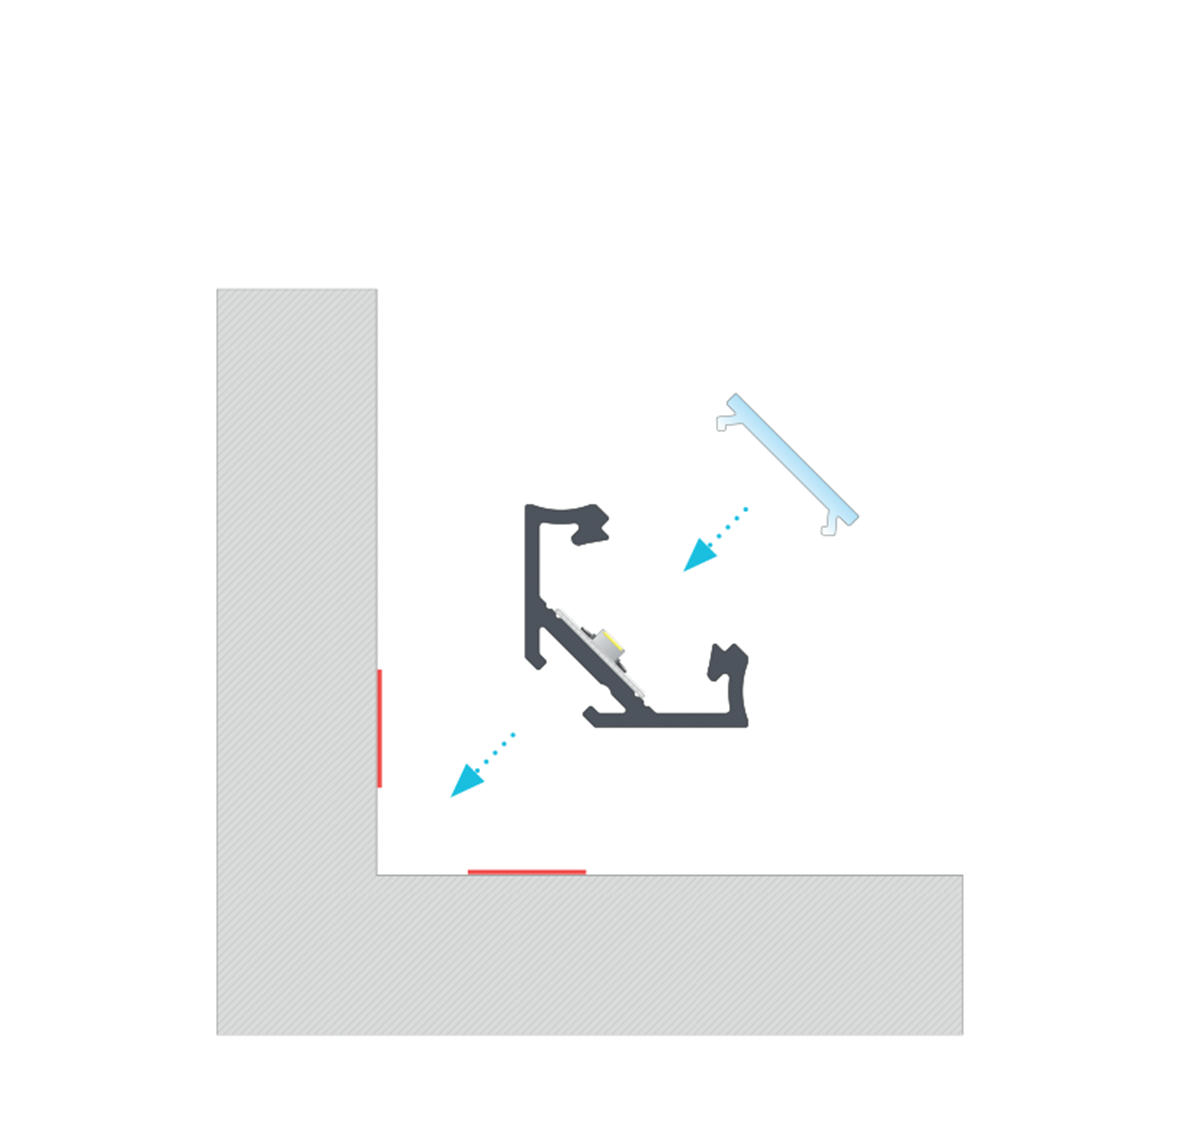
The spring assembly
Spring assemblies are most often used to attach architectural profiles, often of much larger sizes than furniture profiles. These profiles often do not have a perfectly flat bottom, and in this case a spring-assembled installation is the best solution.
A springs assembly is most often associated with installation on suspended ceilings. This does not mean, however, that they cannot be used elsewhere.In order to obtain a stable structure, it is recommended to use 4 springs per 1 meter of the profile.
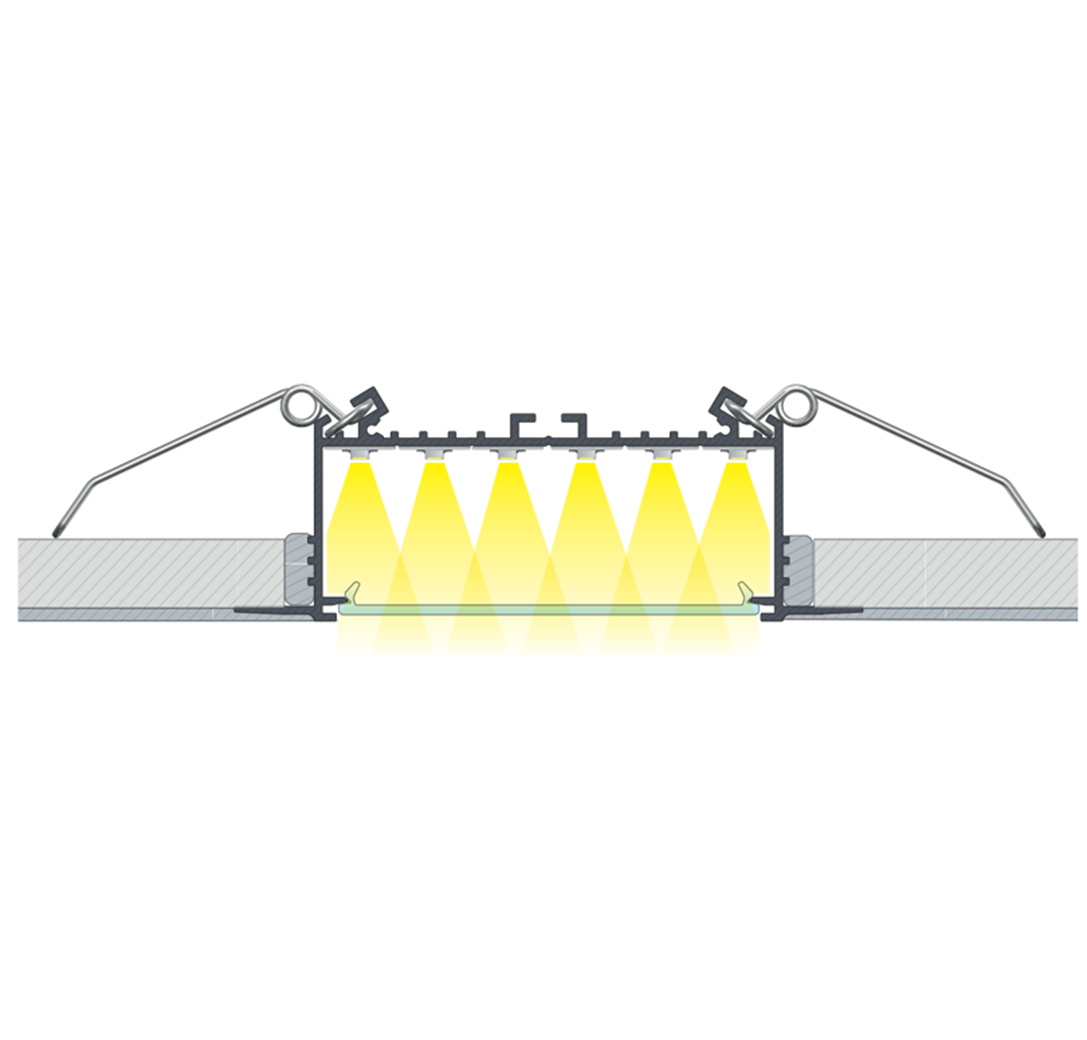
The end result of an installation using the SORGA Lumines profile with mounting springs.
What are mounting profiles and in what cases will we use them?
This type of profile allows us to create main lighting systems. Lack of space for a power supply is a frequent problem when installing an LED profile. By using an additional assembly profile with an appropriate structure, we can find a perfect place to neatly contain the power supply.
Assembly profiles are often a potential alternative to other installation elements. However, sometimes they are absolutely necessary to install a specific profile. This is the case with the LOGI and CONVA profiles, which must be installed using the SPARO assembly profile.
Installation of the CONVA Lumines profile system using the SPARO Lumines assembly profile.
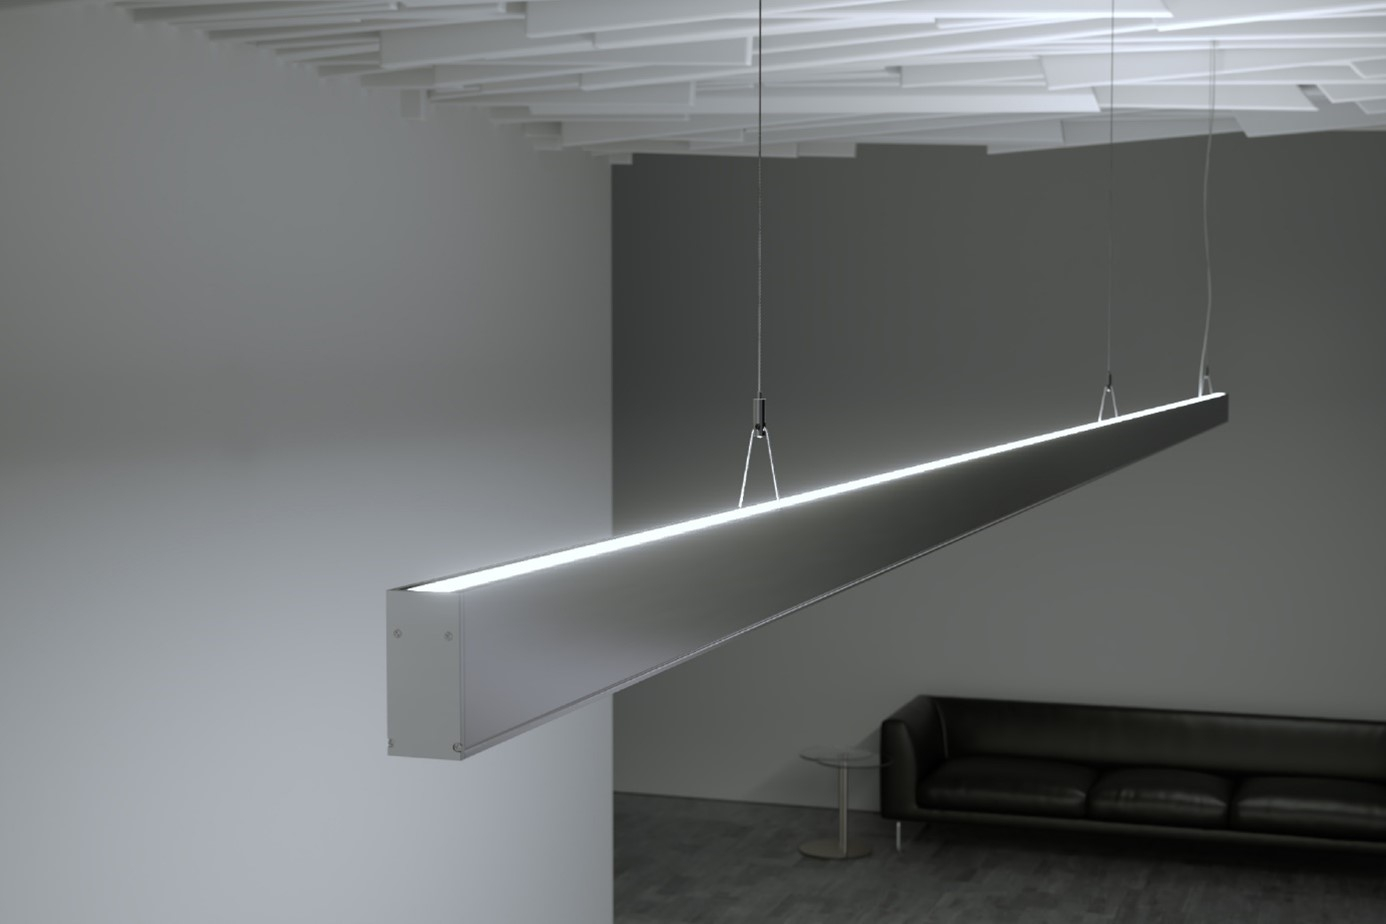
Fixing with suspension cables
We see the demand for hanging LED fixtures increasing constantly. This option requires the use of stainless-steel suspension cables for its installation. There are two types of cables. The first of them: standard cables are simply designed to suspend the light fittings from the ceiling so that the light fitting is closer to the area where illumination is desired. It is not possible to run the wiring inside them, so the wiring is wrapped around the suspension cables. The second type are conductive cables in which the inner part of the cable has a power cord. This solution eliminates the need for external wiring and so increases the aesthetics of the hanging lighting systems.
This type of installation also allows the design of creative forms of lighting. By connecting profiles attached to the ceiling with suspension cables, we have the freedom to create modern and unique lighting solutions.
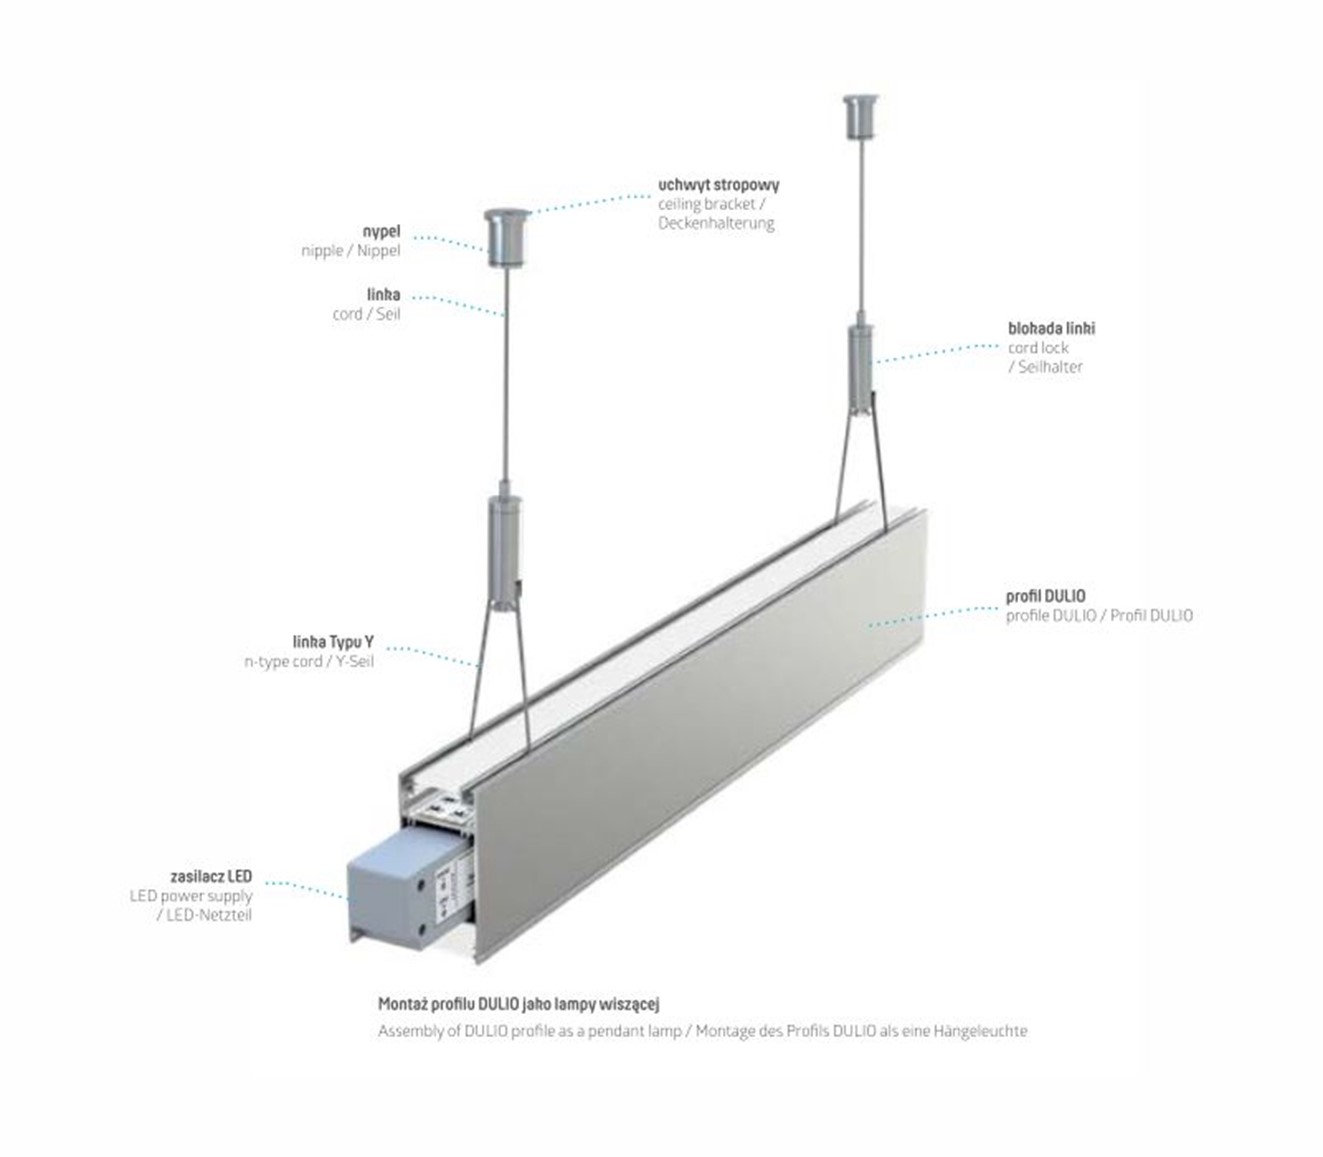
Assembly of the DULIO Lumines profile as a hanging lamp using the Y-type suspension cables.

DULIO Lumines profile installed as a hanging lamp.
Articulated system
Installing an articulated system can completely change the character of any given profile. The articulated system can be attached to any surface – e.g. a wall, desk or cupboard, thus creating a versatile and interesting fixture.
The Lumines Lighting offer includes both oval and rectangular profiles, which can be installed using an articulated system. A great example is the round COSMO Lumines profile, which can be attached to a desk on a movable articulated system, creating a practical table lamp.
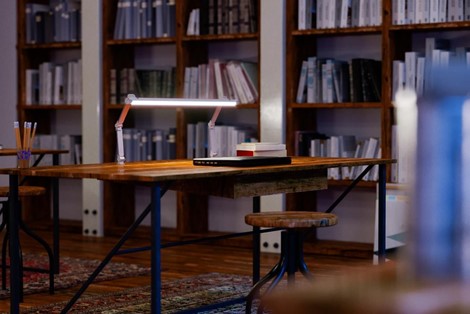
COSMO Lumines profile assembled with an articulated system.
Accessories - end caps / covers
In order for the LED strip placed in the aluminium profile to be fully protected, it is necessary to install an appropriate cover. Depending on the width of the profile, we can install covers that differ in opacity, as well as in the material from which they were made and in colour. We attach the covers by simply pushing them onto the top of the profile.
End caps are also provide additional protection. Here, depending on the profile, we have a choice of different end caps. Many colour versions allows us to match the end caps perfectly to the colour of our profile.
Assembly method of the TERRA Lumines cover.
Summary
The arrangement possibilities of LED profiles largely depends on the installation method. For this reason, at the stage of creating the project, it is worth considering: what end result we want to achieve, what function is to be performed by the lighting, and only then choose the LED profile along with the installation method. It should be remembered that different installation options allow for the creation of a variety of different lighting structures.
Remember that the LED strip itself is not everything. It is important to consider that the appropriate profile not only has its own pleasing visual aesthetic, it also provides great protection against physical factors such as mechanical damage, moisture or dust. After reading this article, you now know that the LED strip and the profile are two essential elements that can be combined with the appropriate installation method - to allow you to achieve the most creative and interesting lighting effects.